The fuel tank is an essential part of the anatomy of a car, and it should be carefully cared for as your car ages. Not properly caring for fuel tanks, over time, can result in complications. Read on to learn about how and why to clean a fuel tank.
Contents
When Is It Necessary to Clean the Fuel Tank?
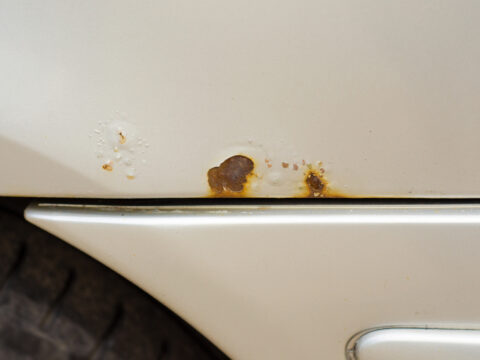
Over time, fuel tanks accumulate sediment, rust and debris from the pump. Tanks also accumulate sludge on the bottom. Removing these contaminants is critical to the health of your fuel tank.
Think about how many miles your car gets to the gallon; for example, if your car gets twenty miles to the gallon, more than five thousand gallons of gas will run through your tank in 100k miles, increasing the likelihood of buildup in and around the fuel tank.
The goal of cleaning the fuel tank is to restore it to the shape it was in when it was first driven off the assembly line. Therefore, most experts recommend you clean your fuel tank every 100,000 miles, or when the fuel pump is replaced, whichever comes first.
The fuel pump may need to be replaced when your car dies while driving. Perhaps your car won’t start, or is demonstrating intermittent starting – this may be a symptom of a dirty fuel tank. It is even possible to require a cleaning of the fuel tank when the car lacks general performance. If your car is 15+ years old or has 175,000 miles or more on it, it also may be time to replace the fuel pump and get the tank cleaned.
Further, there are a few symptoms that may indicate sediment in the fuel tank that needs to be cleaned such as poor acceleration or the sensation that the engine is requiring excess pressure to reach high speeds. Incorrect gas gauge reading can also be a symptom of a dirty fuel tank. The gauge reader necessitates a clean gauge plate to make an accurate reading.
Why Clean the Fuel Tank?
- Cleaning the fuel tank ensures that dust, grime, and other sediment don’t get into your engine and damage it.
- Regular fuel tank maintenance helps prevent fuel lines from clogging up.
- Cleaning your fuel tank helps keep your fuel pump in good running order, for a longer period of time.
- If for some reason your car has been sitting idle for an extended period of time, cleaning the fuel tank will refresh the system and ensure a smoother ride.
- Cleaning the fuel tanks also ensures good acceleration. It mitigates the risk of a non-startup, and incorrect gas gauge reading.
What Are the Safety Precautions When Cleaning the Fuel Tank?
Cleaning a fuel tank is tricky business, and there are certain safety precautions one must take to ensure protection. First, it is recommended that when you drain the fuel tank – something we’ll go into more detail about later on – you drain the fuel into an approved container.
Ask your local mechanic about where to find an approved container – there are certain materials that should not be used for this purpose.
Additionally, after cleaning the fuel tank, you need to ensure that it is completely dry. If not, water in your fuel tank can lead to trouble with acceleration and changes of speed. It is also highly recommended that you wear clean safety glasses, gloves and have a fire extinguisher at the ready.
Fuel Tank Cleaning Procedure
Tools and Equipment Needed
Let’s get into the actual procedure for cleaning a fuel tank, starting by discussing the various equipment you’ll need. First, for safety purposes, purchase a good pair of mechanic safety gloves like those listed here. Also, be sure to procure some basic safety goggles and a fire extinguisher. A very critical piece of equipment is to have on hand an approved closed container in which to drain the gasoline before you clean.
This vital step can be accomplished by purchasing a commonly approved container such as this one. According to OSHA, these containers should hold no more than five gallons of fuel, with a spring closing lid and spout cover. If possible, it would be prudent to attain a pressure washer so as to clean the tank thoroughly.
Lastly, it’s important to wear a ventilated mask while working with the fuel tank, so you’re not directly inhaling those harsh fumes. Below are the steps to get you started on cleaning your fuel tank with this equipment.
Step 1: Safety First!
There are a few small preparations you can make to ensure safety while cleaning your fuel tank. First, take a moment to declutter your workspace, keeping it clear of unnecessary items so you can focus on the task at hand.
Secondly, make sure there is ventilation in your workspace by opening any doors or windows or even setting up a fan. These preparations, coupled with having a fire extinguisher handy, a mask, goggles, and gloves, will help ensure your safety during this complex task.
Step 2: Read Your Owner’s Manual
Next, take a moment to reference your car’s owners manual. Look for the section about your fuel tank and take notice of any special instructions there may be in there. Taking note of these instructions can be important as you continue to the next steps.
Step 3: Drain the Tank Into Approved Container
The first thing you’ll want to do when cleaning your fuel tank is to drain what’s left in the tank into an approved container. See the above recommendations and details about approved containers for how to find one.
Step 4: Add a Cleaning Solution
Perform this step to remove the grime and rust buildup in your tank. You’ll need a cleaning solution, which will break down the rust. After applying the solution, leave it to sit for a couple of hours, and the rust and slide will remove easily.
Step 5: Degrease and Wash Your Fuel Tank
Following the draining of the engine, if it still smells like gasoline, you’ll need to de-grease your tank. You can utilize a commercial degreaser or simply some hot water and dish soap. Leave this mixture in the tank for 24 hours.
You’ll also need to wash the tank thoroughly, and it is recommended you do this by using a pressure washer, making sure to angle the water as you can so as to remove any debris stuck to the walls of the tank.
Step 6: Clean Fuel System
Run a detergent-based fuel additive through your fuel system, being sure to reference your owner’s manual for guidance. This will ensure your system is flushed and anew.
Step 7: Leave It to Dry for 24-48 Hours
After cleaning the fuel tank, it needs to be thoroughly dried before reinsertion. This will avoid acceleration and startup issues in the future.
Who Should Clean Car Fuel Tanks?
Most professional mechanics are able to perform fuel tank cleaning services. A few popular providers include Autozone, Pepboys, and Ace – all of which are national chains. These are just the most widely distributed, but check your local listings because there very well could be a great deal waiting for you.
How Much Does It Cost to Clean a Fuel Tank?
Fuel tank cleaning services range in cost from $50 to $80, depending on the provider you choose. Whether you do it yourself or have someone else do it for you, you should ensure that you are keeping up with the care of your vehicle.

