While you could purchase inexpensive air fresheners at the store, there’s something fulfilling about crafting your own out of repurposed objects. You may also perfume your own air freshener with aromas that you like. And you’ll know exactly what’s in it, which isn’t the case with most commercial car air fresheners.
Contents
Can You Make Car Freshies Yourself?
You may indeed create your own freshies. You can do this in a variety of ways. They’re simple to make and will keep your vehicle smelling fresh and clean without costing you a fortune on air fresheners. You’ll not only save money in the long run, but you’ll also breathe in fewer pollutants. It’s healthier for you, your family, your pets, and your bank account!
Method 1: DIY Car Air Freshener With Essential Oils
Things you need
- Wool Felt
- Scissors
- Punch Pliers
- Your preferred essential oils
- Yarn, ribbon, or string.
Step 1 – Cut The Felt
Cut out the required size and shape from the felt.
Glue cardboard to make it sturdier if the felt is too flimsy for you.
Step 2 – Punch Holes In The Fabric
Punch a hole at the top for the yarn with the punch pliers.
Step 3 – Add Your Favorite Essential Oil
Choose your favorite essential oil and sprinkle a few drops on each side. Peppermint, tea tree, and eucalyptus are all fantastic options, but you may use any sort. Spread the oil evenly throughout the cloth so it doesn’t collect in one location.
Because essential oils have a strong scent, use them sparingly at first. Then, if the scent isn’t strong enough, you can add more essential oil.
Another method is to put around 20 drops of oil in a spray bottle with four fluid ounces (120 mL) of water. For a milder, more evenly spread aroma, mist the cloth.
Step 4 – String The Felt
Place the yarn in the small hole and hang it on the rearview mirror in your car.
Method 2: DIY Car Air Freshener Without Essential Oils
Things needed
- Felt Fabric
- Scissors
- Eyelet punch
- Sewing Needle and Cotton
- Ribbon or Twine
- Dried Herbs of choice- Mint, dried oranges, crushed lavender, and dried rosemary work well.
Step 1 -Cut Out Felt
Cut out two matching felt shapes in your preferred size.
Step 2 – Use The Needle And Thread
Sew the two pieces together with the needle and cotton, allowing a gap for the herbs to be inserted.
Step 3 – Insert Herbs
Insert your dried herbs and stitch the hole.
Step 4 – Punch A Hole
Pierce a hole at the top to slide the twine through and hang your air freshener in your vehicle.
Method 3: How To Make Aroma Bead Air Fresheners With Glitter (DIY)
Things you need
- Your choice of glitter
- Aromatic Beads
- Container or Mason Jar
- Cookie sheet with nonstick coating
- Cookie cutters made of metal
- Your Favorite Essential Oils
- Puffy paint or food coloring
- Nails for roofs
- Pliers.
Step 1 – Combine Beads and Essential Oil
Mix together the aroma beads, glitter, food coloring or puffy paint, and essential oil.
Scoop up the beads and fill a jar with a lid halfway. Add three teaspoons of your favorite essential oils. Reduce the quantity of fragrance oil you use if it has a strong aroma.
If you’re dying the beads, you may first add the food dye to the fragrance oil. It just takes a few drops of dye to get a bright color, and the fragrance oil should completely coat the beads.
Although glass jars are preferable, you can also use plastic containers with lids.
Step 2 -Shake The Container And Put It Away
After the beads have been placed in the mason jar, secure the lid tightly and shake vigorously. It might take up to a week for the oil to completely absorb; certain oils absorb faster than others.
Temperature also has a role; oil absorbs more rapidly than in cold weather in warm weather. Patience is needed. Shake the mason jar or plastic container often to ensure that the oil covers the beads evenly.
When the scent beads are finished, they will no longer adhere to the edges of the jar or container.
Step 3 – Fill Your Cookie Cutters
Preheat your oven to 300 degrees F. Arrange the cookie cutters on a baking sheet. Insert the roofing nail, flat head down, into the cookie cutter. The function of the nails is to make the hole through which you will loop the ribbon.
Fill the cookie cutters with the beads, making sure they are tightly packed. Bake for 10 to 15 minutes, or until the beads melt and fuse together.
Step 4 – Remove Nail and Add Your String
Once the cookie cutter with the melted beads has cooled, remove the air freshener. Twist the air fresheners in a clockwise manner using your pliers to loosen the roofing nail before carefully extracting it from the beads.
Finally, tie your string or ribbon around your air freshener and hang it in your vehicle.
Method 4: DIY Car Air Freshener Using Baking Soda
Things you need
- Mason jar (half-pint)
- Baking soda
- Essential oils of choice
- A scrap of cardboard
- Scissors or a hobby knife
- Thumbtack
Step 1 – Cut Out A Circle
Remove the lid from a Mason jar with a capacity of 4 fluid ounces (120 mL). Mason jars feature a twist-off ring around the metal lid. Then cut out the circle tracing the metal lid on the cardboard. Keep the ring and set it away from the metal lid for another project.
Mason jars are great for storing smells since they are composed of glass, and it makes them ideal for stowing away as powerful air fresheners where no one will notice them. They’re also simple to reseal and reuse.
Make sure your jar can contain the baking powder and essential oil you’ll need for the air freshener.
Step 2 – Poke Holes In The Cardboard
Poke a few holes in the cardboard with the thumbtack.
Step 3 – Fill The Jar
Fill the jar halfway with the baking soda and add 20 drops of your favorite essential oils.
Step 4 – Add The Metal Ring
Close the lid with the cardboard and metal ring and place it in a cup holder or under a seat in your vehicle, but a little baking soda may spill out if it flips over.
Method 5: DIY Car Air Freshener With Wax Melts
Things you need
- A tiny jar with a cover that can be sealed
- A solid nail and a hammer
- Two wax melts.
Step 1 – Add Wax Cubes To The Jar
Remove the lid of the jar and set it aside for the next step. You should place at least two wax cubes in the container.
Step 2 – Punch Holes In The Jar
Punch a few holes in the top of the lid with a hammer and nail.
Step 3 – Hang The Jar
Hang the jar in your vehicle after sealing it with the freshly drilled holes. It becomes heated in your vehicle, which melts the wax and releases its scent via the holes you’ve punched in the lid, making your car smell amazing.
Step – 4 Place The Jar on The Dashboard
If your jar is too big to hang, place the jar in the sun to allow the wax to melt and release its scents.
Method 6: How To Make A Car Air Freshener With Perfume/Cologne
Things you need
- Favorite perfume or cologne
- An empty spray bottle
- Water
- Unscented Essential Oils (optional).
Step 1 – Empty An Old Spray Bottle
Remove the contents of an old spray bottle or buy an empty one. The mist should be pretty fine.
Step 2 – Add Your Choice Of Perfume or Cologne
Use 3 to 4 drops of perfume per 1/2 cup of water to dilute your perfume in the bottle. You may also add 3 drops of unscented essential oils to this combination, such as jojoba oil.
Step 3 – Mix And Spray
Mix the solution well. Spray the air with this combination whenever you wish to get rid of odors.
Step 4 – Fill Up As Needed
Fill up the car air freshener as often as you need to.
Instead of using a spray bottle, you can also make a car air freshener using dryer sheets. Allow your favorite perfume to sink in by lightly spraying the dryer sheets with it and placing it by your car’s air vent.
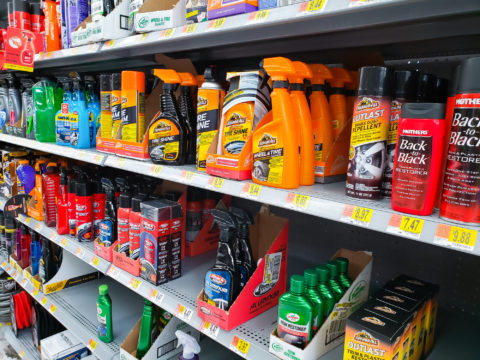
Where To Buy Car Air Fresheners
Most car air fresheners can be bought at any retail store and online. If you do decide to make your own car air freshener, you can easily find the supplies at any craft store.
Summary
The best thing to do is place the freshener in the glove box, start the vehicle and drive for 15 minutes to allow the aroma to sink in. After that, just remove the container and hang or position it as required. It’s as simple as that. Just make sure the container is kept in a cool, dry location.