If you’ve discovered that a screw is in your tire, you’ll want to know what the next steps are in order to address the issue. This article will present several considerations and solutions to the problem of a screw stuck in your tire.
Contents
How to Tell if There’s a Screw in Your Tire
People might drive around for a while before they notice there’s a tire in their car tire. Here are a few ways to tell if a screw is in your tire.
Hissing Sound
When a screw becomes lodged in your tire, you may immediately notice it due to air leaking from the puncture site. The puncture can cause a hissing sound. If you are driving and hear this sound, find a safe place to pull over and inspect your tire.
Slow Loss of Air Pressure
Sometimes a screw is so securely lodged into a tire that you cannot hear an audible hiss. However, air will likely still slowly leak from a tiny amount of space around the screw. If you notice a loss of air pressure, inspect your tires.
Changes in How Well Your Vehicle Handles the Road
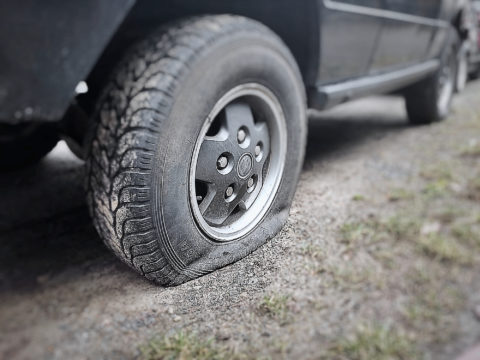
If the screw causes a fast leak of air from your tire, you might notice a change in your vehicle’s drivability. The issues can come in the form of difficulty accelerating, steering, or a bumpy ride.
Can a Tire with a Screw in It Be Repaired?
The tire may be repairable, but the answer depends on the location of the screw and the size of the hole.
If the screw is located in the tread area of the tire and no larger than 1/4in diameter, you or a mechanic may very well be able to repair the tire. If, however, the damage is to the shoulder or sidewall of the tire, then you may need to replace the tire.
How Long Can You Go with a Screw in Your Tire?
While driving with a screw in your tire long-term is certainly inadvisable, you may be able to operate the car in the short term to get your vehicle to a location where the tire can be repaired or replaced. If the screw is adequately plugging the hole, then your tire shouldn’t be losing a rapid amount of air pressure, and can likely drive the vehicle to a safe location for service.
However, if the driveability of your vehicle is being affected, then it is highly advisable to pull over and switch to a spare or call for roadside assistance.
How Screws Find Their Way In Tires
Even when you’re careful, there are several ways a screw can end up in a car tire. Here are some of the most common.
Parking Lots
A common way for a screw to end up in your tire is simply by unknowingly driving over it, often in a parking lot, especially near construction sites where someone may have been working with hardware and accidentally dropped the screw.
Poorly Maintained Roadways
Some public roadways aren’t maintained as well as others. While it’s more likely that you’ll drive over a screw in an area where people work, you may travel over a screw on a roadway that isn’t consistently maintained or adequately clear of debris.
Your Driveway or Garage
Your driveway or garage can often be the reason screws end up in your tires since these are common sites of DIY construction projects.
Sabotage
While it’s not likely, someone could sabotage a tire by puncturing it with a screw. Before jumping to this conclusion, however, remember that it’s far more likely that you accidentally drove over a screw.
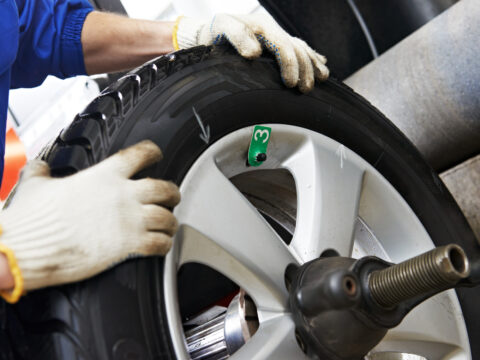
How Do You Fix a Tire with a Screw in It?
If your tire is in the repairable zone, there are a few solutions that can be applied to get your vehicle back to a roadworthy shape. If the screw is located in the tread, then you may be able to temporarily fix the tire with a DIY kit.
This repair should allow you to drive in the short term until you can take the vehicle to a professional shop for a permanent repair or replacement.
Tools and Equipment Needed
To perform a DIY temporary repair of your tire, you may need (depending on whether or not you have already found the location of the screw) the following tools and equipment:
- Jack and jack stands
- Spray bottle filled with soap and water
- Paper towels
- Pliers
- Tire plug-and-patch kit
- Snippers
- Tire inflator
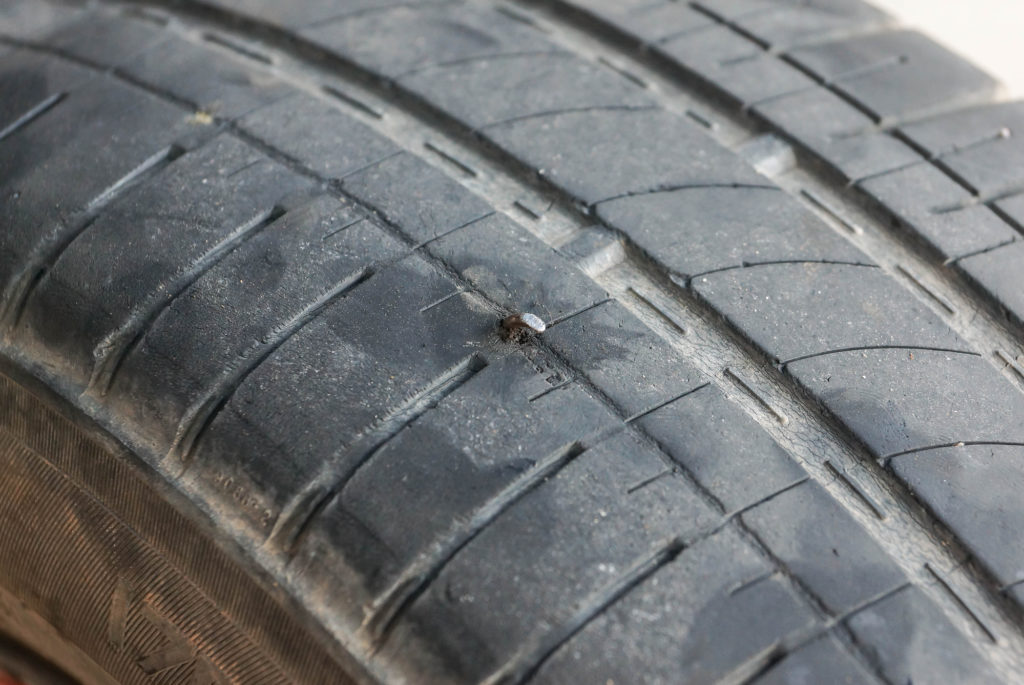
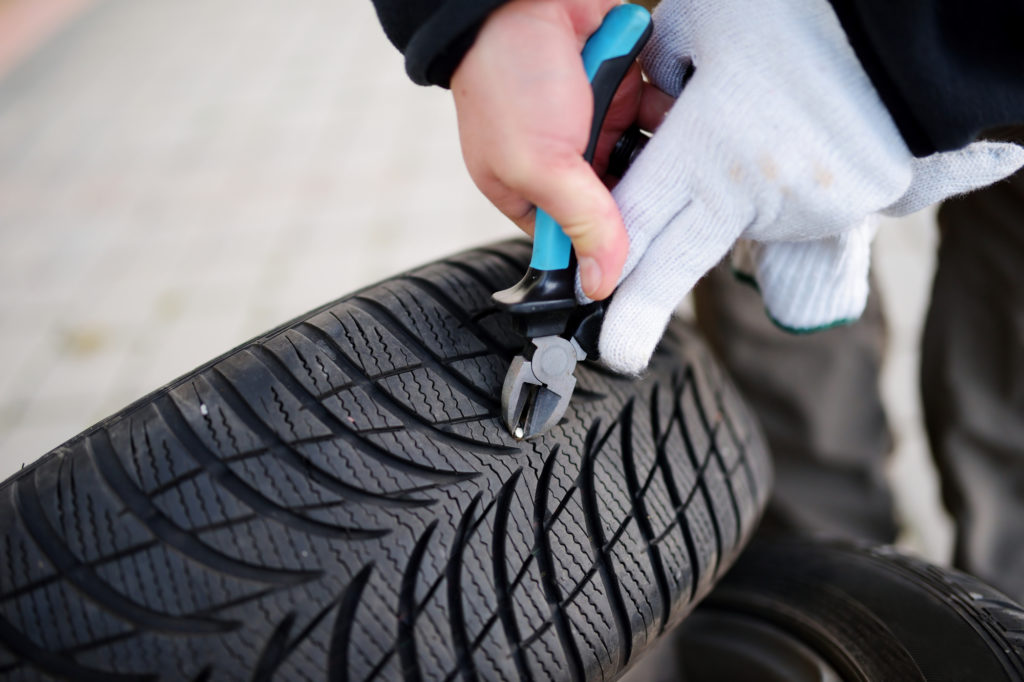
Step 1. Locate and Remove the Screw
The first step in your repair will be to locate the screw in the tire. If you can’t seem to find the screw, then you’ll likely want to jack the tire up off the ground (always secure the vehicle with jack stands!) so that you can freely spin the tire and inspect the whole area. You may want to also spray down the tire with soapy water. If there is a leak, soapy bubbles will start forming from the location of the leak.
After you have found the screw, the next step is to dry off the site of the puncture and remove the screw from the tread of the tire. Using pliers, grasp the head of the screw and wiggle and pull on the screw until it dislodges from the tire.
Step 2. Prepare Puncture Site for Plugging
Using the reaming tool found in complete plug-and-patch kits, twist the tool down into the punctured area and rotate it back and forth. This will widen and roughen out the hole in the tire to prepare the puncture site for the plug strips. Then line the hole with the tire sealing cement found in your kit.
Step 3. Prepare and Insert Plug Strip
Next, take a plug strip from your kit, thread it through the eye of your plug insertion tool until the plug strip is centered on either side of the tool, and coat the strip with the sealing cement. Now, using the plug insertion tool, jam the plug strip down into the puncture site until there’s only about an inch or less of the strip sticking out of the hole. Then carefully slide the tool off the strip.
Step 4. Inflate Tire and Check for Leaks
After you plug the hole, you’ll want to confirm that the tire is no longer leaking. Fill the tire to its appropriate air level and spray down the plugged site with soapy water. If no bubbles form then you’ll know that the repair is successful.
Step 5. Snip Off the Excess Plug Strip and Remove Jack Stands
After confirming that the plug is successful, you’ll want to snip off the excess strip, leaving only about 1/8th of an inch remaining. Finally, place your jack back under the vehicle and place it in the proper position, remove the jack stands, and lower your vehicle.
How Much Does It Cost to Repair a Tire with a Screw in It?
For a temporary replacement, most DIY plug or patch kits range from $5 to $50 depending on what the kit contains. Kits that contain both a complete patch/plug kit and a tire inflator are generally more expensive, while kits that contain the bare bones without an inflator are less expensive.
When you take the vehicle to a shop for repair if the tire can be repaired, expect to pay somewhere in the range of $10-$40 for a permanent repair of your tire.
Should You Fix It Yourself?
You may be wondering if you can skip the trip to the mechanic and permanently fix the puncture yourself. It’s best to treat DIY repair kits as temporary solutions until the tire can be permanently repaired at a professional shop.
Permanent repairs require that the tire be taken completely off the rim and the interior of the tire be prepped and repaired along with the exterior site of the puncture. It is possible to perform this in-depth repair yourself if you have the skills, experience, and proper DOT-approved patch materials.
However, given the commonly low cost of paying a mechanic to permanently repair the tire, taking it to a shop is likely the easiest solution.
Is It Better to Leave the Screw in the Tire?
If the driveability of the vehicle is not affected yet due to the tire only leaking a very little amount, then your best bet is likely to leave the screw in the tire and drive it to a repair shop.
If you take the screw out, the puncture site will no longer be plugged and the tire will rapidly lose air. However, the screw definitely should not be left in the tire long term as it can continue to cause damage to your tire and create a dangerous driving condition.