We’ve all been there before; the check engine light suddenly illuminates, and you’re left wondering just how serious this problem is. Furthermore, neglecting only amounts to gambling, where you are sure to lose at the most inopportune time. The issue can be as serious as a misfiring engine or as minor as a loose fuse. This can be particularly troubling if you’ve just had an oil change and this happens.
Contents
What Does the Check Engine Light Mean?
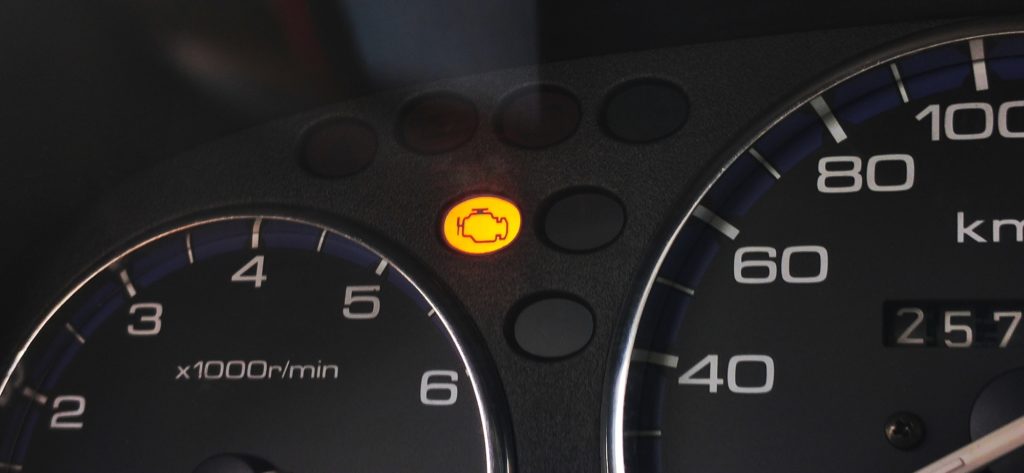
The malfunction indicator lamp (MIL), more commonly referred to as the check engine light, is a signal that is relayed from the car’s engine computer notifying you that something is wrong.
Moreover, the check engine light is part of the onboard diagnostics system for your car. Therefore, when the system finds that it can’t self-correct, the computer turns on the check engine light.
Not only does the computer turn on the check engine light, it actively stores a “trouble code” in its memory to identify where the problem lies, such as an engine that’s misfiring or some malfunctioning sensor.
The way to go about reading the code is via a diagnostic computer or an electronic scan tool—both standard equipment in auto repair shops around the country. Interestingly, there are even code readers that DIY individuals can purchase, and they are relatively inexpensive.
However, the code will only show you where the problem is located, but you may still need the experience of a professional to diagnose further and fix the problem.
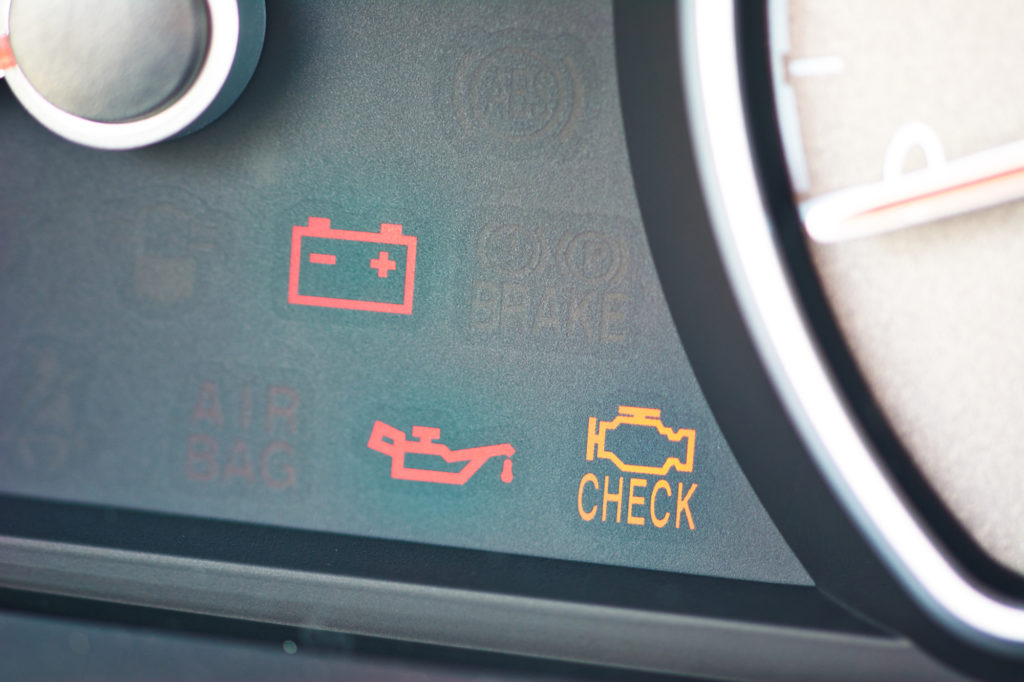
How Does the Check Engine Light Look?
A check engine light can be yellow, orange, or amber; this depends on the manufacturer. However, if instead of being illuminated—it begins flashing, this indicates a more severe issue. The problem could be a misfire that could quickly overheat the catalytic converter.
Why Is the Check Engine Light on After an Oil Change?
Seeing a check engine light soon after an oil change typically happens because the oil dipstick is not fully seated or fitting the oil filler cap backways. We’ll describe how to fix those issues and some other underlying problems that may be the culprit.
Lack of Oil Pressure
Remember that simply checking the oil properly should not trigger the check engine light. Moreover, draining the oil from the car’s engine will reset the oil pressure gauge.
Be mindful that replacing the oil and installing a clean filter will not give the gauge enough time to read correctly. This will temporarily cause the check engine light to come on because the car “thinks” that the oil is low.
Dipstick Not Fully Seated
You use the dipstick to check the level of the engine oil. The dipstick will be removed, cleaned, and reseated many times during an oil change to check the oil level.
The dipstick fits snuggly in the dipstick tube, and an O-ring creates a seal when the dipstick is set into place.
If the dipstick is left off, unmetered air will be able to the engine. This can cause damage to internal engine parts like the cylinder walls, pistons, or valves.
Too Much Oil
If you put too much oil in your engine, it might cause the check engine light to come on. Your car could stall because the engine is sluggish or misfiring.
It can also cause smoke to come from the tailpipe, an oil leak, or it could just not start up at all.
Gas Cap Is Crooked or on Backward
Sometimes after people change their oil, they fill up their gas tanks, and the cap isn’t screwed on correctly. It could be backward, or it could be too loose. These problems will alert the system, and the check engine light may come on.
Using the Wrong Oil
It’s essential to ensure that you use the correct oil in your vehicle. If the oil is the wrong viscosity, grade, or weight, it can cause problems for your car. An example of using 10W-40 oil instead of 5W-40 oil is because you thought they were relatively similar.
An oil that is too viscous will not offer the proper lubrication, meaning it will not transfer heat correctly. That means the oil will get hot too quickly, causing your check engine light to come on.
How Do You Fix the Problem?
Try these simple steps to get the check engine light to turn off:
Solution 1: Lack of Oil Pressure
The first thing you should do is start your car and let it run for a few minutes, allowing the new oil to pump and circulate the engine. If this was the problem, it should immediately remedy the check engine light.
Solution 2: Dipstick Not Fully Seated
The easy way to fix this is to open the hood, find the dipstick, and ensure the tube is not clogged. Once you know that it’s clear, readjust the dipstick until it is firmly inserted.
Solution 3: Too Much Oil
Also known as oil overfill, you can fix this problem by using a suction pump to drain the excess oil. Pop your car’s hood and decide whether you want to drain the oil from the dipstick tube or the cap access point. Choose between a manual or an automatic pump.
Solution 4: Gas Cap is One Crooked or Backward
Try to get the light to go off by removing the gas cap and putting it on correctly and tightly. The writing should be facing you on some vehicles, which may have been the problem as to why it was backward, as this varies from vehicle to vehicle.
Solution 5: Using the Wrong Oil
You can correct this problem by draining the oil from your vehicle. You’ll need to replace the oil filter and refill the car with the correct oil type.
How to Reset the Check Engine Light After an Oil Change
These steps will help you to reset the check engine light after a fresh oil change:
Tools and Equipment Needed
It doesn’t cost much to purchase the necessary tools, an Onboard Diagnostic reader, such as the Kobra OBD scanner, and a wrench. This reader will help you analyze engine codes to clear them.
Step 1: Find the Port
The port for an OBD reader is typically on the bottom of the dashboard right above where your feet sit; there might be a fuse box door to remove to gain access.
Step 2: Connect the Reader
After connecting the reader, push enter to turn the device on.
Step 3: Wait for Codes
Allow the device to scan the engine for error codes. After it finishes analyzing the vehicle, you will see all error codes displayed on the screen. Take notes on the codes you want to check online or against the manual.
Step 4: Erase the Code
Use the scroll button to highlight the code and push enter again to erase it. This should reset your check engine light.
Step 5: Restart Your Vehicle
If the light does not go off right away, you should restart your car to give everything a chance to reboot.
Should You DIY or Use a Mechanic?
Repairs can be expensive. Aimless tampering can cause additional problems in the future. Overall, it shouldn’t cause too much concern if your check engine light is still on after an oil change because it’s usually a quick fix. If not, seek the help of a professional mechanic.